The Kitchen Floor Dilemma
If you have been following along you might already know that we removed the wall between the dinning room and the kitchen to create a more open space. The problem was, the kitchen had a cheap linoleum floor, while the dining room side was a natural clear coat 2.25" birch (see the above "before" picture), which extended into the living room.
In an ideal world we'd love to have a heated polished concrete floor for the kitchen/dining room space. While we did briefly dream about it, this idea was quickly veto'd because of cost. With budget in mind, we decided to extend the hardwood from the dining room into the kitchen so the whole level at least had the same flooring.
Given that the hardwood initially was laid unfinished and then sanded/clear coated after installation, we felt the easiest option was to find unfinished 2.25" birch to lay on the kitchen side and then sand and refinish the entire space. This way the two rooms would blend seamlessly, color and finish wise. Seems pretty straight forward? Not quite. We went to look for the wood, but no one carried unfinished birch, let alone in the smaller 2.25" plank size. Some could get it, but it was all special order and cost almost the same as pre-finished hardwood.
Option number two was to find a pre-finished product that would match. The issue here was that newer pre-finished hardwood comes with beveled edges that form "V" shaped grooves between the boards when laid. Since the pre-finished products obviously won't be sanded after they're installed, the grooves help to help minimize minor height differences between the planks. These micro bevels wouldn't match the existing floor, not to mention there would definitely be a color/finish difference between the 20+ year old clear coat birch and the new pre-finished hardwood. It was very important that the transition from new to old floor be perfectly seamless so it didn't look like there used to be a dividing wall.
Our only options at this point seemed to be either special order the unfinished birch (which would still require us to refinish the entire surface) or rip up the existing dining room hardwood and lay the pre-finished product (which would be beveled and have a new finish, so it still wouldn't quite match the adjacent living room's birch).
Then we started thinking: "Did we really need to go with birch hardwood? What about our original vision of a concrete floor? Maybe a tile could emulate the look of concrete for a reasonable price?"
After a few weeks of searching multiple flooring vendors we still couldn't find anything we liked. It wasn't until we dropped into Centura that we found the perfect tile. It was a light grey porcelain tile that, when laid, looked like natural stone/concrete! We couldn't believe it. This was pretty much the look we wanted from the start! The tiles were 12"x24" so they had a pleasing rectangular shape and covered more area than your standard 12"x12". As for cost, we figured if we did the work ourselves, it would come to within $0.50 per square foot of the price of the pre-finished birch hardwood. The tiles did need to be ordered in from Centura's Toronto warehouse - apparently they hadn't sold any of it's kind in the province yet (and of course we liked the idea of being the only ones with it)!
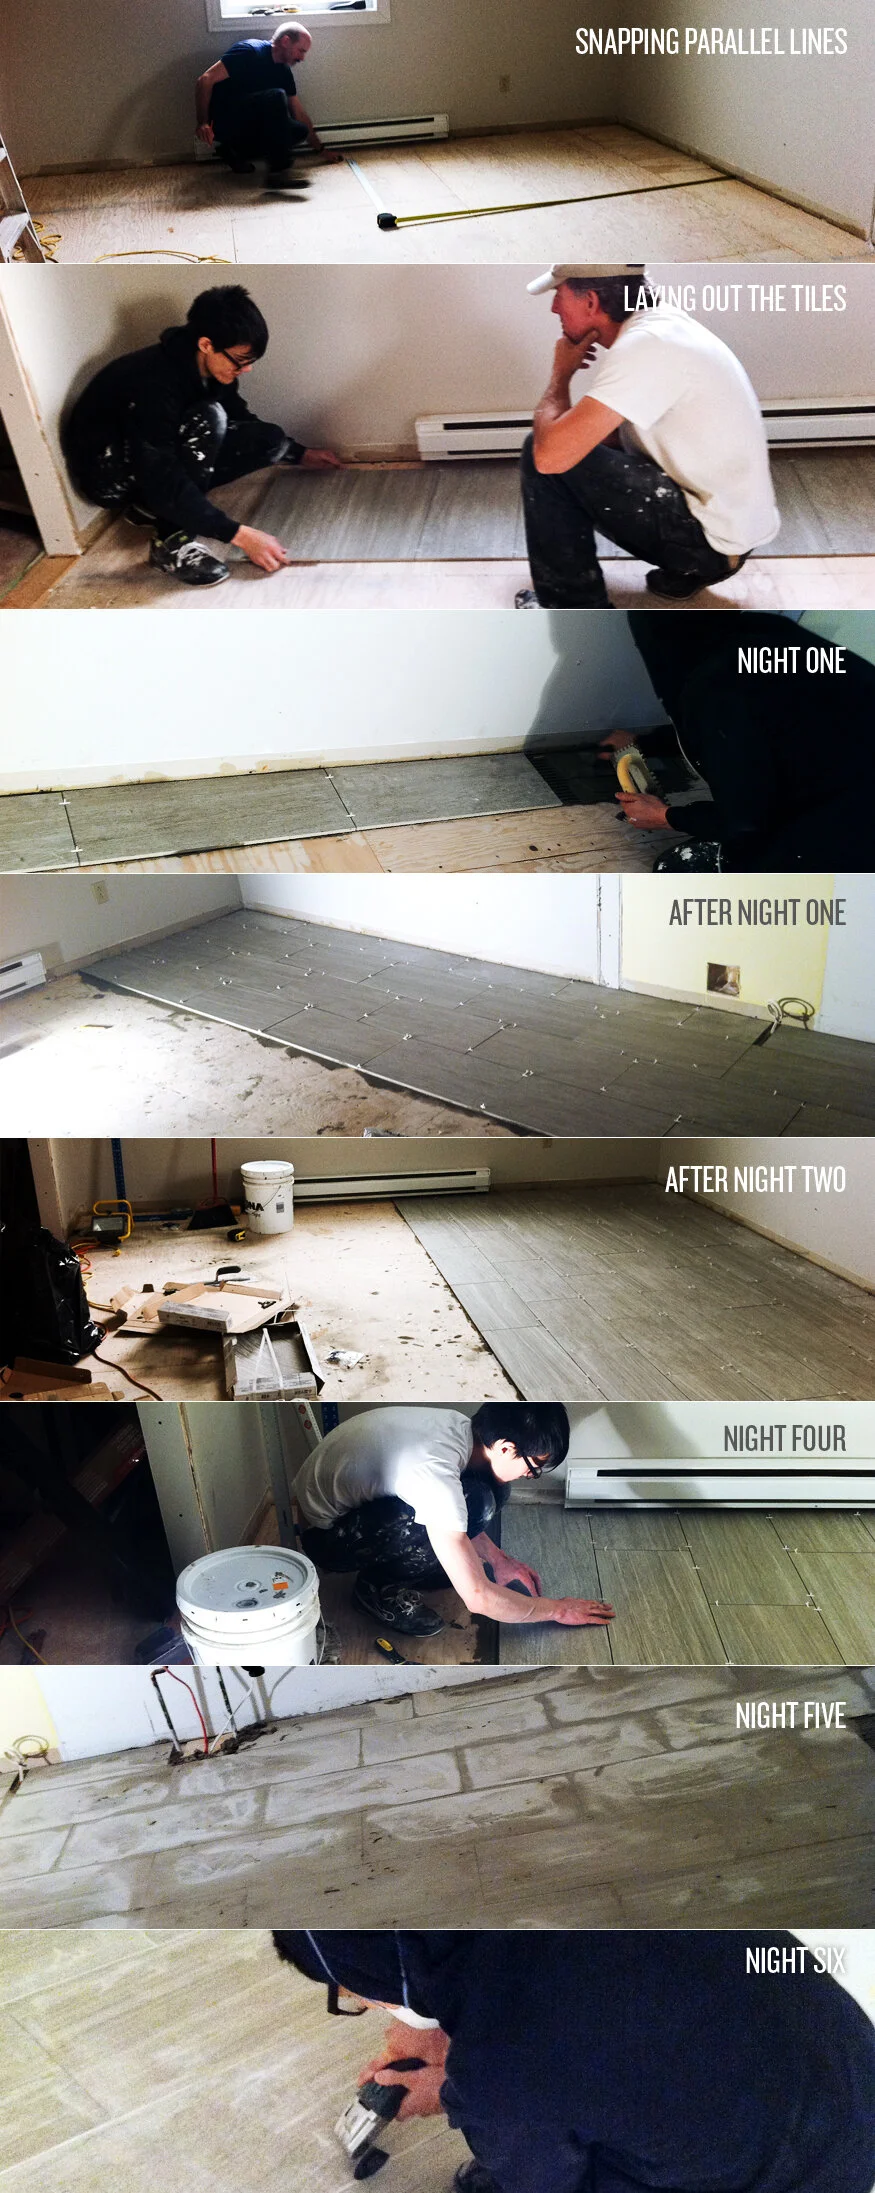
Neither of us had laid tiles before so we started researching. The DIY network has a lot of info on how to get your tiles down, including this tutorial on how to lay a slate porcelain tile. Luckily, my uncle does all this stuff for a living, and my dad has laid tiles in the past so they both helped us get started. We ordered about 160 tiles, a few bags of mortar and grout. We also picked up all the required tools: mixing attachment for the drill, buckets, tile spacers, trowels, grout floats, etc. Note that we laid down an extra layer of plywood to reinforce the existing subfloor that wasn't quite sturdy enough.
It took us roughly four evenings to get the floor laid and we finished with literally zero tiles left over (we did go back a buy a few extras to have on hand in case we ever need them for a repair). As for grout, we picked a color sample at Centura that closely matched the tile, the object being for it to blend in and make the floor look as much like a continuous stone/concrete slab as possible. We also chose to use an ultra thin 1/16" tile spacer for this same reason.
When we started grouting we were excited because the color matched the tiles perfectly, making the grout lines barely visible. But when we woke up the next day it had dried almost white! We weren't happy with it, and ended up busting out all the work we had dome the night prior (oscillating tool with grout attachment to the rescue)! We went and picked out a darker color that ultimately worked out much better for us.
Here is how it turned out:


