
The Basement Part 3: Framing to Subfloor
When we started the basement process, we came up with a day-by-day schedule to keep us on track. But as with most projects, we grossly under estimated the length some of the steps would take. We are in to the end of our second week and we just put up our first sheet of drywall.
Framing
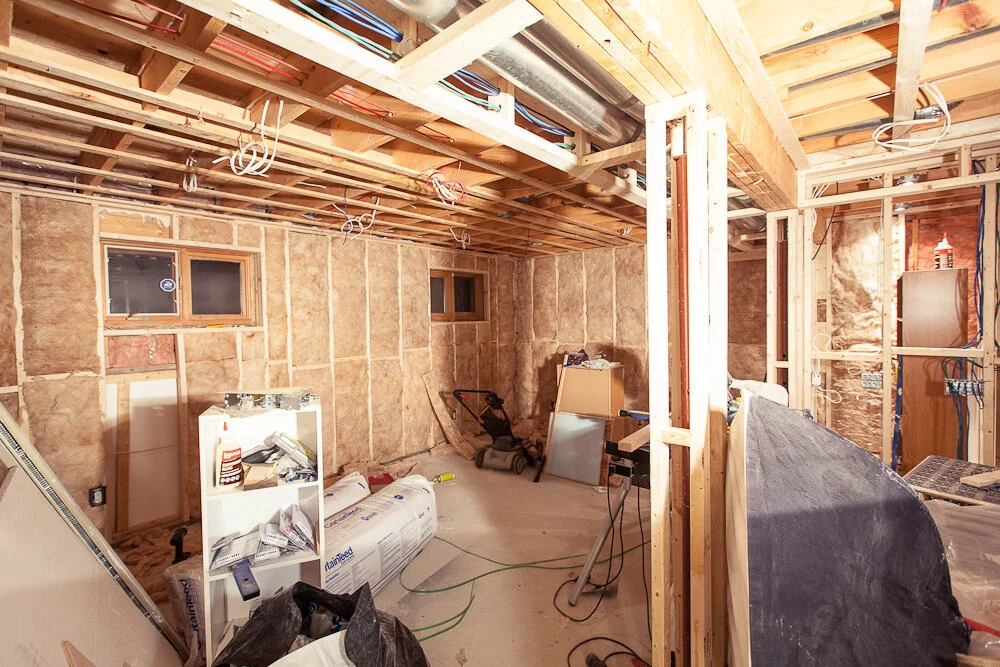
After we finished the demolition, Chris framed up the new exterior walls, camera closet and a soffit for duct work and wiring. He also boxed out the ugly metal support posts. A wall on the staircase was bumped out to accommodate traversing low voltage wiring as well as house some strip lights.


Electrical
We started the basement pretty much from scratch so we had the opportunity to completely customize lighting and receptacle placement. As we mentioned previously, the scattered incandescent bare bulbs in the basement were completely inadequate for the size of the space. We opted to install recessed lights throughout the studio and laundry area and a few basic flange-type fixtures in the crawl space, boiler closet and workshop.
Of course, it wouldn't be an Uncommon Common Law space if we didn't have some kind of speciality lighting going on. We put three strip lights in the walls as the main lighting in the stairwell and a switched receptacle under the stairs for LED strip lights under the stair treads. There will also be strip lights above the standing work station, hidden in a recessed cove. These fixtures are all part of our Insteon network so we can program scenes and control them from our iPhones.
Since we are using the main area as a studio, we added plenty of plugs around the room for our studio flashes. Receptacles on each wall were placed on different circuits to ensure multiple flashes wouldn't trip a breaker. We also added a few outlets in the camera closet to be used as a charge station for our camera batteries. The standing work station features a desk level receptacle with built in USB charger. Low voltage runs also terminate at desk level, with volume control for the in-ceiling speakers and two runs of CAT6. In the laundry area, we added a couple of plugs for ironing and an HDMI run for TV (don't judge, I would rather fold my laundry while watching HGTV IN the laundry area rather than my living room).
Insulation
Last winter, our home was freezing! The basement had next to no insulation and it didn't seem to make sense to heat the unfinished space that we barely used. We demolished everything, framed up new 2x4 walls and installed R-20 insulation. We sealed up the laundry room properly, foamed up all the little holes, and picked up some heaters with a smaller footprint to replace the old larger ones.

It was our first time working with insulation; we threw on these awesome white suits and went to it.

We didn't have a lot of room downstairs so we stored the insulation in the living room.
Vapour Barrier
The previous vapor barrier was not sealed AT ALL! It was actually just stapled on top with a free flapping bottom. We installed new 6 mil poly and went through about 15 tubes of acoustic sealant (AKA Black Death) and multiple rolls of Tuck Tape to seal it up.


Have you ever used acoustic sealant? If not, this stuff is crazy sticky and gets EVERYWHERE. A tip to those of you who will be using it in the future. 1: Don't wear the same clothes around your house that you wore when working with Black Death. 2: If you get it on your butt and then sit on some furniture (cough... like someone did with our Eames chair... CHRIS!) you can use cooking oil to remove it!

Subfloor
We went back and fourth trying to decide how we were going to tackle the subfloor. Between manually putting down sleepers/plywood versus using prefabbed Subflor tiles, we chose the tiles. The tiles were the easiest and quickest install. Though they were a little expensive, but we knew it was worth the time we would save on installation. We ordered 96 of these bad boys from Rona.
The Subflor tiles have an OSB top with a plastic back allowing you to install directly over concrete slab. The plastic on the bottom creates an air gap between the tile and concrete to provide a thermal break. The tiles fit together via tongue and groove. Chris and I blazed through one side of the studio in about two hours. He did most of the work.


We still need to seal up the vapor barrier on the laundry room side and finish putting down a couple of tiles near the workshop door, but the end is in sight! Our boys at Rona delivered 58 sheets of drywall today which will (hopefully) be going up this weekend.


That's a sturdy 2x4 soffit!
- Becki and Chris