
The Outdoor Project: Front Steps
Two years ago, if you walked up to our house it would have been evident that old people lived there (no offence if you're reading this, former owners). White, turquoise and rust red were the colours used on the exterior of the house. Now normally I am a fan of turquoise, but in this case it was not pretty. The pic below was AFTER I painted the 4X4 posts white; they were turquoise previously. Like that mailbox? It's sooo our style... not.

One of the first things we did to the outside of the house was get rid of all the turquoise. We painted the trim and posts on the deck white for a temporary fix and replaced the old door with a new glass panelled version which we got for freeeee (my favourite price) from a renovation project my uncle was working on. We also got rid of the country mailbox and lights and installed more modern black fixtures. We purchased the lights online at Home Depot.

The garden was overgrown so my mom ripped it all out to start from scratch. There were even two trees growing up into the overhang. My uncle Jeff came and cut that down. In 2011, Mom planted some new shrubs which started our new garden.


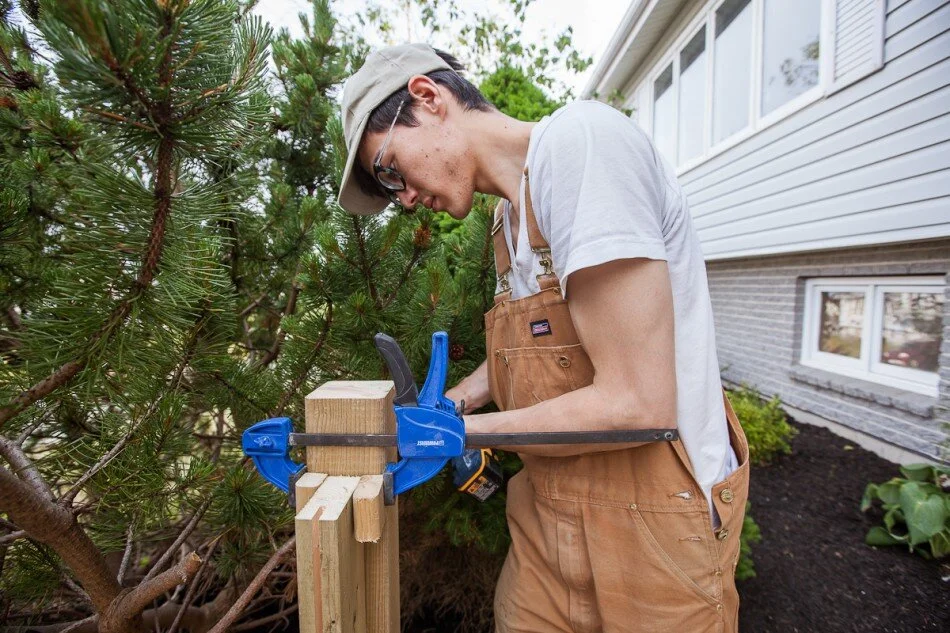
Now that most of the interior is near completion and the weather is getting nice, I decided to take on the front deck as my own little project. I tore out the old posts, which were just stuck down in the dirt, and took up all the old rotten boards. The base of the deck was basically just a planter box with 2x6's on top. We contemplated ripping it all out and building a proper deck structure, but ultimately decided to rebuild what was there due to time and cost. I reinforced the existing structure with new 4x4's and put new 2x6's down. After this was done, the job got a little more complicated than expected so Chris came to the rescue. We tag teamed the rest.


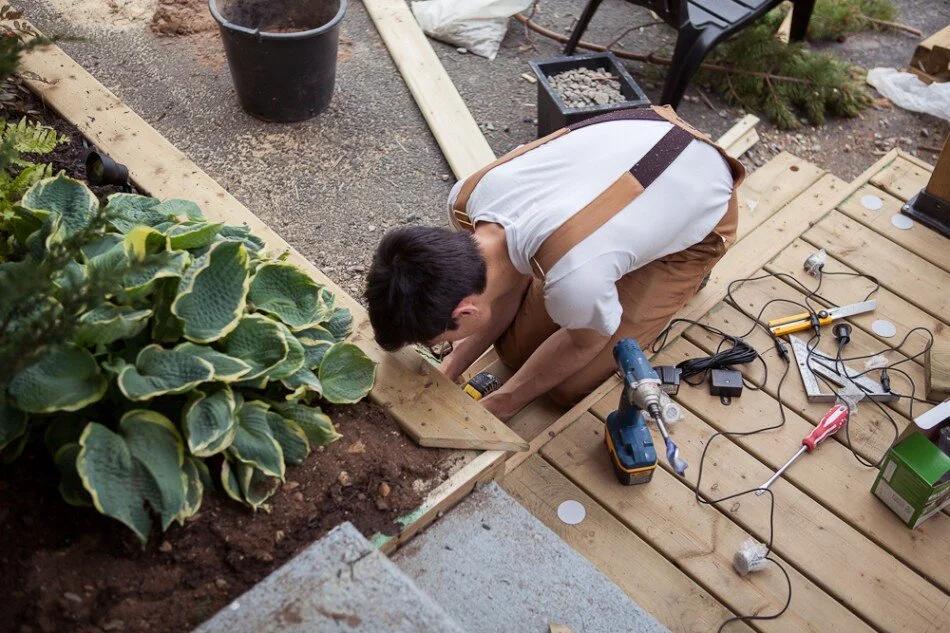
When we removed the old step, it left a gaping hole in the driveway which was lined with a rotting piece of plywood. We took out the plywood and filled the hole with crushed stone. We built the step on top of the stone, lining it up with the deck (which was not level) to make sure it was even with the top. We wrapped the sides with mitred 1x4 decking to finish off the look.

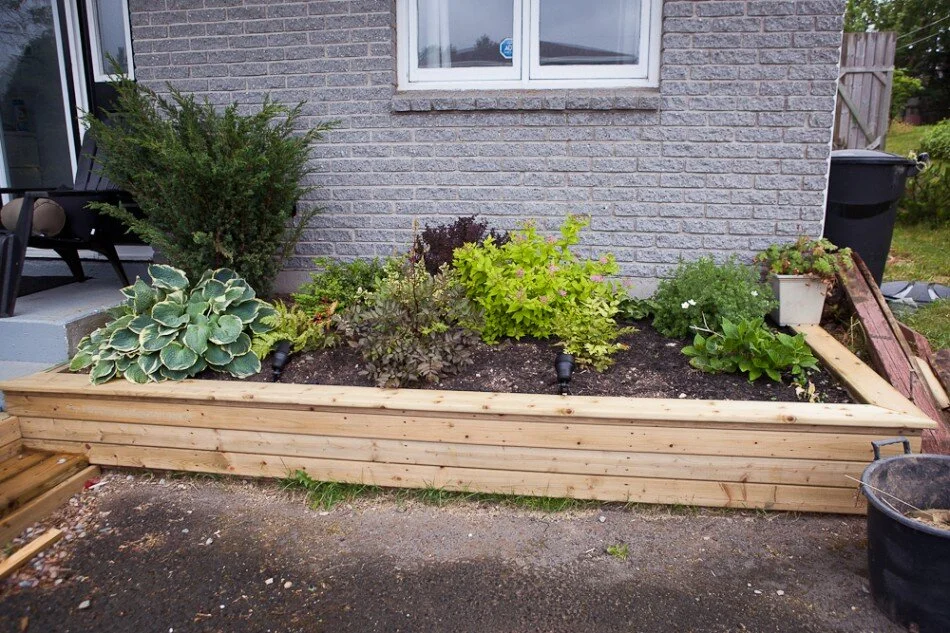
The flower box was in good condition but looked fairly dated. It would have been messy to remove the whole thing so instead we covered it up with 1x4's to match the attached deck.
When digging up the original "before" photos for this post, we noticed that the shrubs my mom planted two years ago have really grown in!
For the posts, we decided to use post anchors that screw directly into the deck since the deck structure was already built. Although they worked fine for this application, I wouldn't recommend using these for a deck more then 2 feet off the ground as they are not extremely sturdy.
As for rail construction, we debated putting wood slats up, then changed our minds to aircraft cable and finally ended up deciding on glass. We purchased pre-cut tempered glass from Kent and made the railing to fit, rather then spending more on custom cut glass. Since the pre-cut glass was a little too small for the deck dimensions, we bulked it up by framing around it with 2x4's and then attaching that to the 4x4 posts. We dadoed out a channel in each of the 2x4's for the glass to slide into.


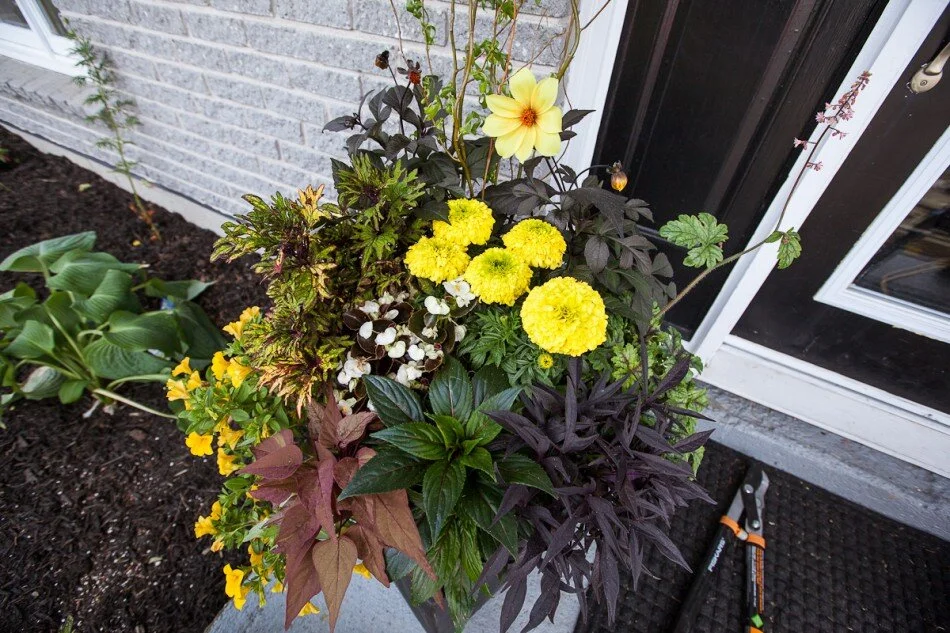
The previous owners had a garden around the front of the house which was also over grown. This summer we replaced it with a new flower bed, planted some new shrubs and covered it in black mulch. This made a huge difference when you walk up to the door as the deck is now surrounded by flower beds. My mom again came over to help with this - she is amazing at gardening! As a birthday gift, she put together the two pots that sit on our step.


When we finished up the deck, we realized that we should have put some landscape lighting in. Originally we were going to get two plug in lights to stick in the flowerbed. You all know we couldn't add just TWO lights. It wasn't enough! We ended up adding four 20 watt landscape lights and five in-deck lights which are all powered by the same switched outlet, which is tied in to our home automation system. Since adding these lights was a bit of an afterthought, we had to take apart sections of the deck to fish wires which was a pain in the ass.


We still have a few things left to tackle like painting that ugly blue concrete step a more neutral light grey and staining the deck a darker colour. We also need to install the new hardware for the door that will match the new interior hardware and box-in the rest of the retaining wall. It's coming together! For now, we have a few chairs out there so we can use the space. Below are a few crappy iPhone pics of us enjoying the deck on a warm night. Several mosquito bites were obtained. Since our back deck looks like this, it's nice to have a place to enjoy our short summer.
